Showing posts with label The Solomons Campaign. Show all posts

Friday, 11 May 2012

The Solomons Campaign: Turn 4 & 5 AAR - Taking Stock

Game and scale: We are using General Quarters 3 to play the tactical battles, and The Solomons Campaign from the same publisher (ODGW) for the campaign. All ships are 1/6000 Figurehead.
What’s Happened So Far: Turn 3 was the turning point in the campaign, the IJA successfully assaulted and took Henderson Airfield and now they held the initiative. http://micromegasatwar.blogspot.ca/2012/03/solomons-campaign-turn-3-aar-empire.html
November 1942
Weather forecast: Overcast (add one to the weather roll)
Turn 4: In this turn his turn the IJA player was pre-occupied with supplying the newly taken airfield and shoring up its position. The IJA’s carrier force had been devastated in the previous months and they only had escort carriers available, therefore as the IJA player I had to leave my carriers at port in hopes that I would get a fleet carrier back in the next turn.  Since my main goal was supply of my island I decided to also send out a bombardment force to attract his attention away from my supply mission and to cause some havoc amongst the retreating Marines on the island.
The USN player predictably sortied his superior carrier force; by luck they were unable to locate my bombardment mission. Since they had just lost Henderson airfield the US player didn’t have enough initiative to attempt a counterattack and so spent his turn also resupplying the Marines on the island.
Turn 4 was pretty quiet as both sides shored up their positions and adjusted to the new reality. Only two turns were left in the campaign.

December 1942
Weather Forecast: Severe weather (add five to the weather roll)
Turn 5: After a rather timid Turn 4, both sides went back to work in their desperate fight over Henderson Airfield. The IJA got their fleet carrier Zuikaku back into action and so were able to sortie their carrier fleet while the USN tried to press home its advantage in carriers. This turned out rather disastrously for one side. On the surface both sides went to work to shore up and supply their land units on Guadalcanal. For my part I knew that in order for the Marines to assault Henderson they would need to be supplied so I launched a kamikaze style patrol mission with my surface ships in order to disrupt his offloading operations.

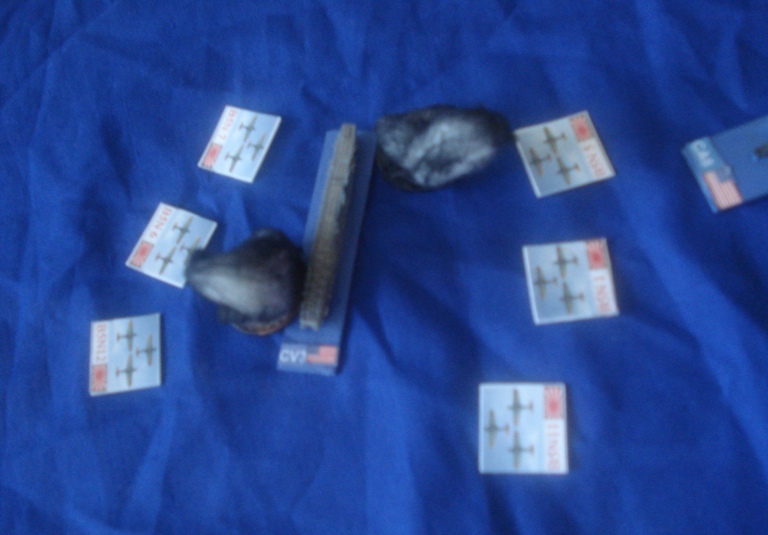
Carrier Engagement: In this carrier exchange, the IJA got the strike advantage first and was able to land a crushing blow to the US carrier groups, two of the US carriers were disabled and had to retreat prior to being able to launch a counterattack.
IJN carrier fleet ready to launch

The surprise achieved by the Japanese planes allows them to land devastating blows to the US carriers


Japanese torpedo planes perform anvil attack on US carrier


Rabaul Patrol vs USN Supply Mission: The USN sent a heavy escort force to accompany and protect their supply mission, the IJN sent just about everything they had in Rabaul to try and intercept this supply mission. While the IJN were outnumbered and outgunned their goal was to prevent the transports from unloading. They were ultimately successful in this goal, although they lost almost their entire patrol formation, the emperor will honour them in the afterlife.
Weather called for squalls and high winds making targeting and visibilty a challenge

A US task force of a battleship escorted by cruisers emerges from a squall and targets the approaching Japanese at full range.

The Japanese approach in a double line, the southern cruiser squadron remains hidden by the destroyer screen which takes the brunt of the initial salvos.

The Japanese player makes an aggressive move towards the US transports, having to fight through two heavy US squadrons and a destroyer squadron whom manage to cross their T. The IJN DD screen is virtually wiped

The IJN cruiser squadron sees the transports in the distance but is blocked by US destroyers, on their flank a heavy US squadron of BB's and CA's is bearing down on them. Off to the left of the screen another US heavy squadron fires deadly salvos.

Torpedo ally, as both forces close in they release torpedoes. At this stage the Japanese cruisers have a clear line of site to the transports and manage to land a few salvos, disrupting their supply mission.

The cruiser squadron is a burning heap and in disarray, the DD squadron is wiped out. After suffering heavy fire, point blank torpedoes, they still completed their mission and prevented the USMC from receiving supplies, albiet at a heavy cost.


Conclusion: The interruption of the supply mission ultimately meant that the US Marines couldn’t assault Henderson, with only one more turn left this means the USMC will have on opportunity left to take back the airfield. I don’t have enough ships left in Rabaul to be able to disrupt all of the USN’s supply missions, therefore this campaign will essentially come down to the final die roll when the USMC manage to assault the airfield. I feel that my strategy so far has paid off, I’ve had to pay a high price in ships to gain and maintain my position, but ultimately I am poised to win the campaign.

Sunday, 11 March 2012

The Solomons Campaign – Turn 3 AAR - The Empire Strikes Back

October 1942
Turn 3: This turn once again saw lots of aggressive action by both sides and some dramatic outcomes that have changed the face of the campaign. Both sides once again sortied a carrier group resulting in devastating losses to one side’s carrier capacity. The Yamato finally set sail and let loose its guns albeit not on the intended target. The Japanese efforts to supply their forces on the island finally put them in a position to assault Henderson airfield, but you’ll have to read below to see the results.
Weather forecast: mostly clear (ie: no modifications to the weather roll).
Game and scale: We are using General Quarters 3 to play the tactical battles, and The Solomons Campaign from the same publisher (ODGW) for the campaign. All ships are 1/6000 Figurehead.
What’s happened so far: Turn 2 (link: http://micromegasatwar.blogspot.com/2012/01/solomons-campaign-turn-2-aar.html) saw some heavy combat around IJN supply missions. The IJN were successful in supplying their troops on Guadalcanal but at a heavy price in combat ships.
Carrier Engagement: For the third straight turn both sides sortied a carrier group. The weather was moderate and mostly clear. The US sortied two CV’s and the IJN sortied CV Shokaku, and CVL’s Hiyo and Junyo. On the first round both sides launched their planes simultaneously, the US airplanes found their targets while the Japanese pilots got lost en route and had to abort their mission. This had some devastating effects on the Japanese Carrier Group as they didn’t have their CAP ready and prepared. In the ensuing air strike the Shokaku was disabled,  the Hiyo was completely crippled and out of the campaign, and the Junyo took some hits but was still functional. Fires on all three carriers prevented a counterstrike so the IJN carrier group withdrew to lick its wounds, the US follow up strike was unsuccessful in finding the withdrawing group.
US Carrier Group

IJA Carrier Group with Shokaku, Junyo and Hiyo

US Carrier Saratoga

Shokaku is attacked by Torpedo Bombers

Junyo taking hits by US Dive Bombers

Japanese Carrier force on fire just before withdrawing.

Truk Bombardment Force vs Allied Patrol: In my bid to take Henderson airfield I brought out the Japanese big guns. The bombardment force ran into an US Patrol, and initially I tried to avoid contact so that I could continue on with the mission. Unfortunately for the US, they engaged my destroyer screen before I was able to withdraw, so I had no choice but to turn my guns around and engage the patrol in return. I had a significant advantage in firepower and made my opponent pay, just about every ship of his squadron was either sunk or crippled, even more damaging was his battleship that took two torpedo hits and was out of the campaign.
US Heavy Cruisers pursuing

IJA destroyers screening the bombardment force while the US pursue.

The Japanese turn and train their heavy guns on the US Cruiers and Battleship divison

Japanese heavy cruisers and Yamato light up the light up the Allied ships

Meanwhile on the other side of the battlefield the Japanese destroyers run into the USS South Dakota, despite taking heavy fire they let loose torpedoes and land enough to take the US ship out of the campaign.

Supply Missions: The Tokyo Express successfully completed another run to give the assaulting forces enough material to amass their attack. Meanwhile the US also sent two supply missions that were unmolested.
BONZAI!: The Japanese gather their martial spirit and assault Henderson airfield. Their force of will proved to be too much for the Marine defenders as the Japanese successfully wrested control of the airport. I needed to roll a 1-3 on a D12 to make a successful assault, and it was important that I did this in Turn 3 because it would get harder with each successive turn of the campaign. We decided to keep things simple and just roll for the assault rather than playing it out on the table.
Japanese Bonzai Attack and take Henderson airfield
The roll that changed the campaign.

Conclusion: Turns 2 and 3 cost me (the IJN player) heavily in terms of surface ships and carriers, but the ultimate goal and key to winning the campaign is the control of Henderson airfield. Despite poor odds I still got a lucky roll and took the airfield. This changes the dynamics of the campaign and opens up many options for me. As long as I didn’t have Henderson I was tied down to a bombardment mission, a supply and an assault mission to try and take the airfield. Now I hold the initiative and the US player is under pressure to take the airfield back. This also breathes new life into the campaign, I think I was on the verge of defeat and wouldn’t have been able to take the airfield if it didn’t happen soon, I was sustaining high casualties and my enemy was only getting more reinforcements.

Monday, 23 January 2012

The Solomons Campaign - Turn 2 AAR

Turn 2, September 1942
Weather forecast: mostly clear (ie: no modifications to the weather roll).
First off I’d like to apologize for not having any combat pictures. I really dislike AAR’s that are just text and don’t have any eye candy so I substituted historical pictures I managed to google. My wife went to a baby shower the same day as this campaign turn and took our only good camera, and apparently someone’s new baby took precedence over the epic struggle over Guadalcanal.
Game and scale: We are using General Quarters 3 to play the tactical battles, and The Solomons Campaign from the same publisher (ODGW) for the campaign. All ships are 1/6000 Figurehead.
What’s happened so far: Turn 1 (link: http://micromegasatwar.blogspot.com/2012/01/solomons-campaign-turn-1.html) was a tacit affair, both sides mobilized their carriers but were unable to locate the enemy carrier group. The IJN successfully bombed and suppressed Henderson airfield and received reinforcements of more light carriers. The USN supplied their Marines holding the Cactus Airfield but was unsuccessful in its patrolling efforts to stop the IJN.
Turn 2: Unlike Turn 1, this turn saw lots of devastation in the air and sea. The allies managed to successfully bomb the IJA forces gathering on Guadalcanal, and the Marines made a successful Recon of the island’s perimeter further disrupting the Japanese army. Meanwhile Admiral Nimitz made a tour of the area boosting the morale of the troops.
Carrier Engagement: Both the IJN and the USN sortied their carrier groups to seek out and destroy the opposing side’s carriers. This time the USN sortie struck first causing some serious damage to the Zuikaku and temporarily disabling it. The IJN’s second carrier Shuikaku launched its sortie in response and managed to cripple and disable the Wasp. The third round of sorties was inconclusive as both sides withdrew. All in all the IJN got the better of the exchange by crippling the Wasp, but the Zuikaku being out of action for at least two months will limit their carrier capability in the near future.
US Torpedo Bombers formation
US Dive Bombers attaking the Zuikaku
US Wasp is left a burning heap from Japanese Torpedo and Dive Bombers

IJN Supply Mission vs USN Patrol: The USN managed to decode some of the Japanese transmissions and successfully intercepted one of the two IJN supply missions this turn. A bloody and confusing night battle ensued as the US Patrol of two heavy and four light cruisers attempted to disrupt the supply mission. They were met by a powerful force of IJN of one heavy cruiser, six light cruisers and seven destroyers escorting the Tokyo Express. The USN used their radar to detect the lead cruisers of the IJN and opened the first salvo, the IJN quickly threw up a smoke screen around their transports and returned fire with the remaining ships. The battle got mess very quickly as the US ships made an aggressive move toward the docked transports and the IJN screens threw themselves in between. Lots of torpedoes were launched at almost point blank range with both sided taking serious damage. US firepower was overwhelming as the Japanese ships got themselves tangled up with their own and the US ships. In the final hours of the battle two Japanese destroyers collided with US light cruisers. Both the Japanese and US admirals decided to cut their losses and withdraw. The US Patrol in the end did not disrupt the supply ships from unloading but they did cause terrible damage on the Japanese escort squadron, almost wiping it out completely with the exception of one 1 light cruiser and 1 destroyer. In the end the US lost 1 heavy cruiser and 2 light cruisers, while the Japanese list 6 destroyers, 1 heavy cruiser and 4 light cruisers. The cost was very high for the Japanese forces but their supply mission was successful. Later in the turn the IJN managed to later slip a supply past the US patrols with no incident.
The US Heavy Cruiser New Orleans is the Capital Ship of the Patrol Force

US and Japanese ships exchange fire in the night
Japanese ships are a burning wreck, though their supply mission is hidden from the US Patrol

As the IJN player, I was successful in my two supply missions but it was a Pyrrhic victory because I paid a heavy price for the first mission. The two sides now have parity in carrier strength and neither one seems hesitant to use it. On the bright side my successful supply missions positioned me well to assault the Marines on Henderson Airfield.
If there is an Assault we have to decide whether we want to just roll for the land battles as per the campaign rules or whether we want to adapt the roll into some land battle mechanism with FoW. The problem is that FoW doesn’t have lists for the Pacific theatre and I don’t actually have Marines and IJA forces so I’d have to port Brits and Germans.

Lastly, I may not be a very good tactical naval commander, I lost more ships than I should have in the last battle and I am not very effective with the placement of my torpedoes, maybe I was made to be a landlubber. Regardless, I am thoroughly enjoying this campaign and the intense surface actions it created this turn.

Monday, 9 January 2012

The Solomons Campaign – Turn 1

This past weekend, me and a friend of mine started The Solomons Campaign from ODGW, using GQ3 to resolve tactical combat. I have been on a WW2 naval bend for a little while and decided on 1/6000 scale ships for the sake of space, convenience and cost. I’ve also been craving a campaign of some sort for a while. I tried a foray into board games last year but they just don’t capture my imagination the same way table top wargaming does. I really like the way TSC is set up and plays out, it took us some time to work out the sequence and to fix a few errors but now that we have it figured it I’m looking forward to the rest of the campaign.

We started the campaign with the assumption that the Savo Island occurred and used the historical results.
Date: August, 1942
Weather Forecast : Moderate
The Japanese forces in Rabaul are forced support operations in New Guinea and therefore have fewer naval assets at their disposal to support the Guadalcanal effort. The Americans have no choice but to run a supply mission to support their Marines holding Henderson airfield. 
Both the Americans and Japanese sortie a carrier group but neither side has any luck in finding the other and the carrier exchange is inconclusive.
The Japanese send a powerful bombardment force to suppress Henderson Airfield, the Americans respond in kind with their own bombardment force. The American force is unable to locate the enemy and the Japanese effectively suppress the Cactus airforce. The Americans do, however, successfully get their supply lines to the island to provide some relief to the poor shell shocked Marines.
Due to the diversion of the Rabaul assets the Japanese did not get a chance to supply their troop build-up on Guadalcanal, but they did get the Junyo, Hiryo and Ryujo.
The first turn didn’t see any surface or air action as both sides shored up their positions or were unsuccessful in their attempt to intercept the other side.
A couple of my own comments on the campaign: we were pretty unlucky in our rolls for the carrier on carrier action and for the bombardment intercepts. We both had a thirst for combat and it’s good to see that both of us were fairly aggressive but I think the campaign should provide a higher probability of engagements occurring (but maybe they’re more accurate this way). Because there were no surface engagements we had time to play through half of the Turn II, where another carrier engagement occurred and the first die roll would have ended the battle but in the interest of blowing things up we decided to ignore it and re-roll. The second turn also set up a surface combat that will be interesting to play out.
Since there were no surface actions to speak of here are some pics of my fleets:

IJN Fleet

USN Fleet

US Destroyers

US Heavy Cruisers
Yamato